Regardless of your skill level, learning what settings you have at your disposal is important when it comes to getting great results. Knowing how and when to change settings is often the difference between good and great footage.
Once you get to editing it is often too late to re-shoot, so plan, test and explore the settings on your camera. Here is our guide to the 10 most important technical tips for shooting with your GoPro.
1. Choose the right resolution resolution?
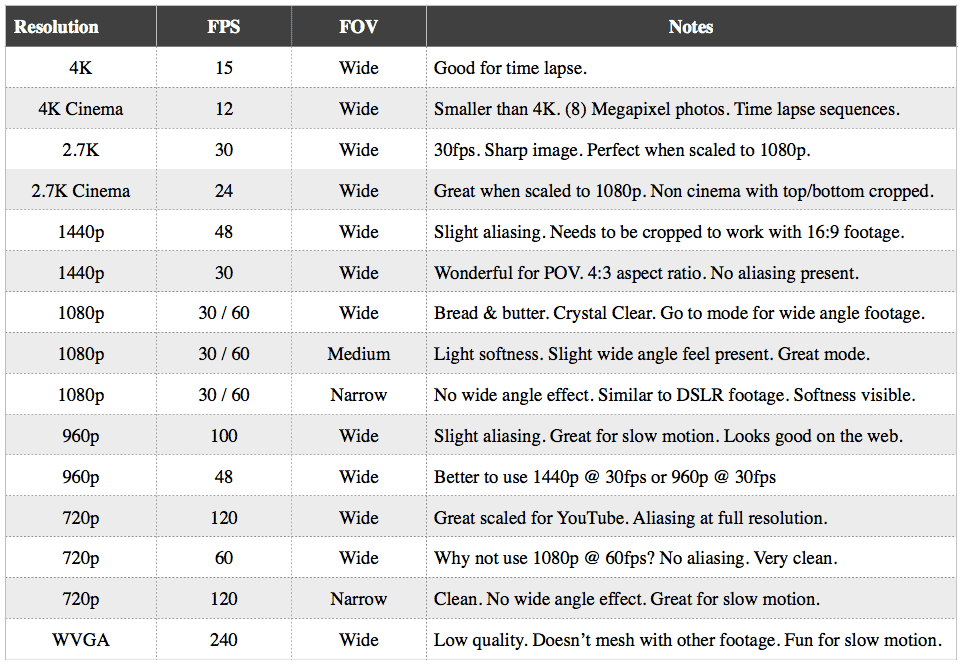
The resolution effects the quality and size of the footage. However there are different frame rates available at different resolutions and the file size of your clips (and computer power required to edit them) changes as you increase the resolution. so, have a think about what you want to do as you will want to stick with one resolution for your entire film as it will make your life easier*.
This handy guide will help. For us, we usually shoot at 1080p as it gives us access to all three Field of View settings (see next page), but if we know we are only going to showing people on a computer, or uploading to Facebook or YouTube we go for 720p as it gives us access to the 120 frames/sec mode which helps when analysing moves.
*If you plan to mix footage with other devices like iPhones of DSLR’s, check what resolution they are shooting in too.
2. Choose the correct Field of View (FOV) for what your shooting
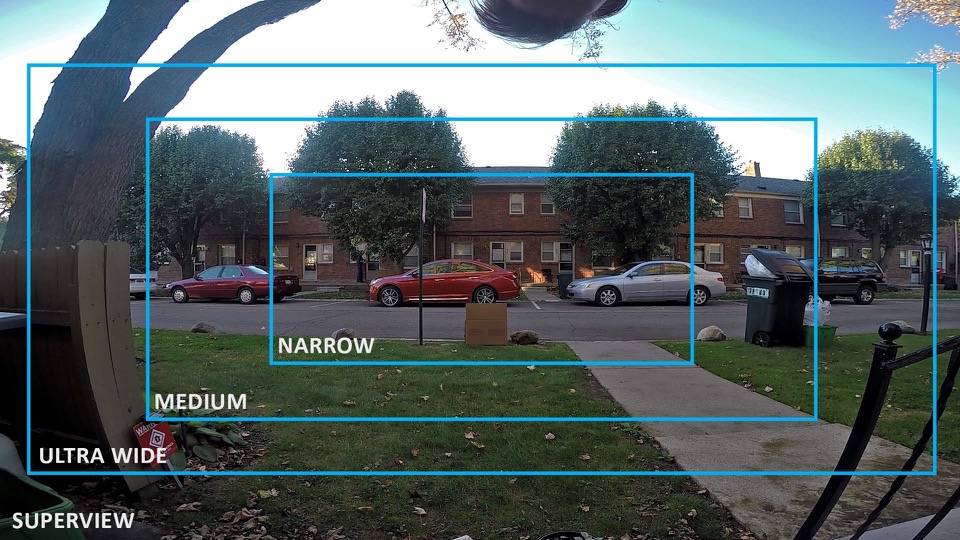
The GoPro allows you to select Narrow, Medium, Wide & Super View, …when shooting anything by closeup action the ‘normal’ view makes for a much less ‘GoPro’ look and feel to the shot especially when shooting lifestyle scenes.
This is also very helpful if you are in the water and the rider is not riding or making tricks right in front of you as it will reduce the chance of them being a small spec in the frame. However not all modes are available in all resolutions.
3. Get the best slow motion shots
You can slow a clip down in any video software, but if the frames aren’t there then you will lose quality and it will look fuzzy. If you know you want to use slow motion, make sure you have the frame rates maxed for the resolution you are shooting at.
This fantastic video from Waterlust shows and explains this very well*.
*We do not recommend using the WVGA setting for anything other than films to do not intend to ‘edit properly’ as although you get super slow-mo, the quality and size is not ideal.
4. A polariser is the best accessory you can buy
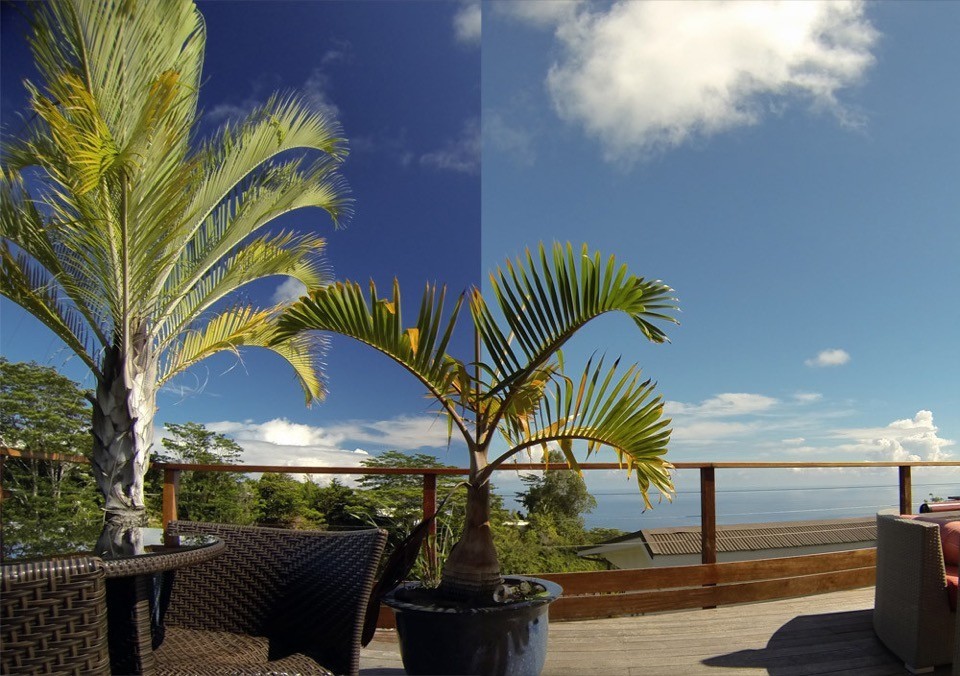
A polariser does 3 main things, cuts out glare (especially useful on water), saturates colours and improves skies. Ok, technically it does more than this, but lets keep this simple.
Polarisers cost from €20 – €200 and you do not have to buy the most expensive, but of course the better the quality the more your shot will be improved. You can find a huge selection of polarizers on Amazon and most GoPro accessories shops.
5. keep your lens clean and always carry a ‘dry object’
This may sound obvious, but how many of us have landed the trick, been super stoked to have it on camera only to realise that there is a giant drop of water on the lens.
Just because the GoPro goes in water, does not mean it HAS to go in the water. If you keep your lens clean and dry you will get much better shots, and for the person standing in the water this can be as simple as keeping a dry t-shirt around your neck of a small dry cloth under your hat.
6. Sunlight changes everything
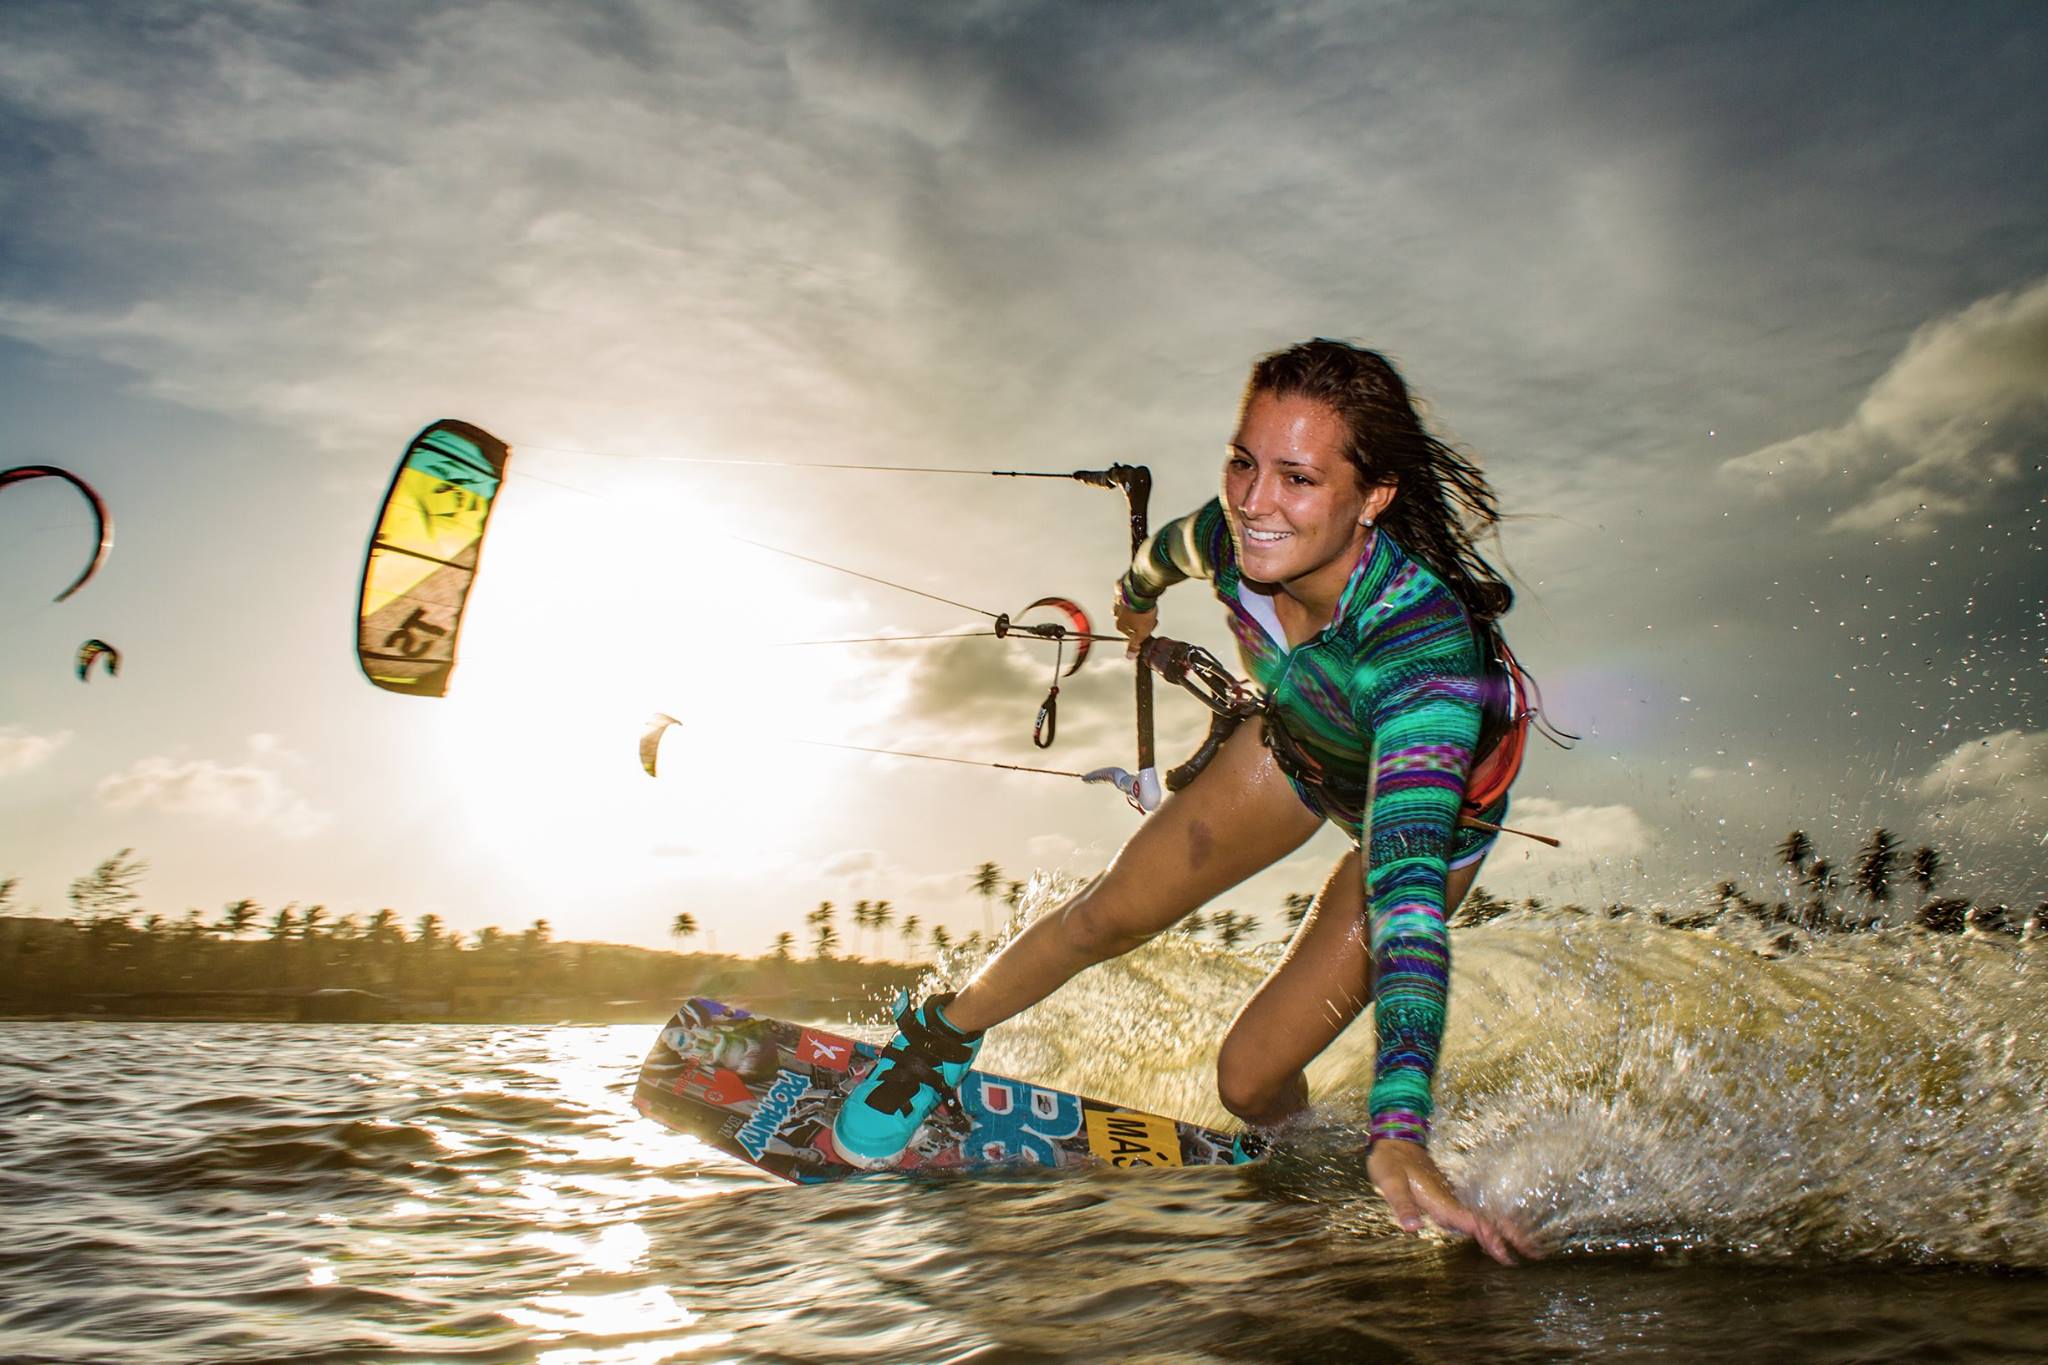
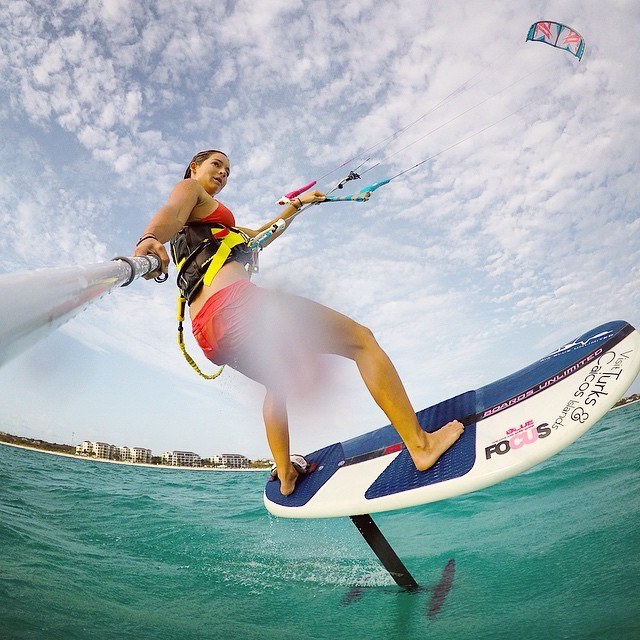
Film and photography is nothing without light. It is the key element. Use it to your advantage as everything looks better in sunlight. If the sun goes behind a cloud for a moment, wait for it to come back before continuing to shoot and try and plan your shoot times.
7. The Golden Hours
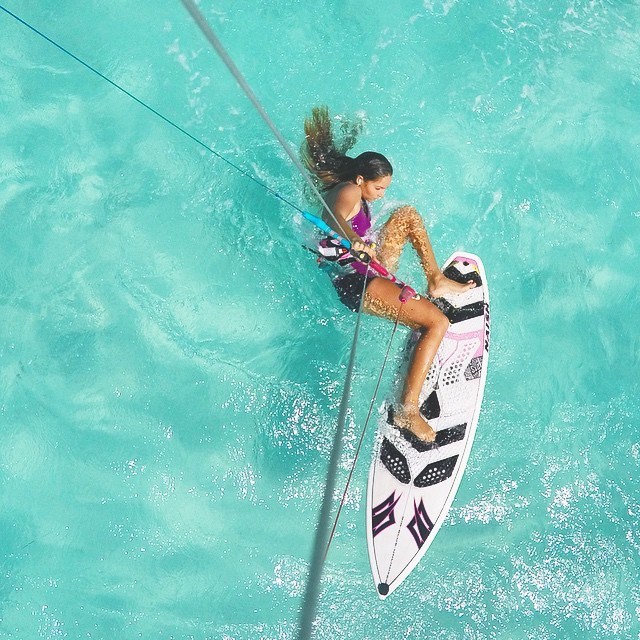
They are called the golden hours because of the colour of the light and the fact that they are the perfect time to get the best shots. You want the sun in front or behind you in an ideal world, not over your head, and the best time for this is sunrise and sunset.
Get up early, or stay out late, but if you want the best colours and most amazing shots, these are the times to shoot.

8. White Balance is not a scary concept.
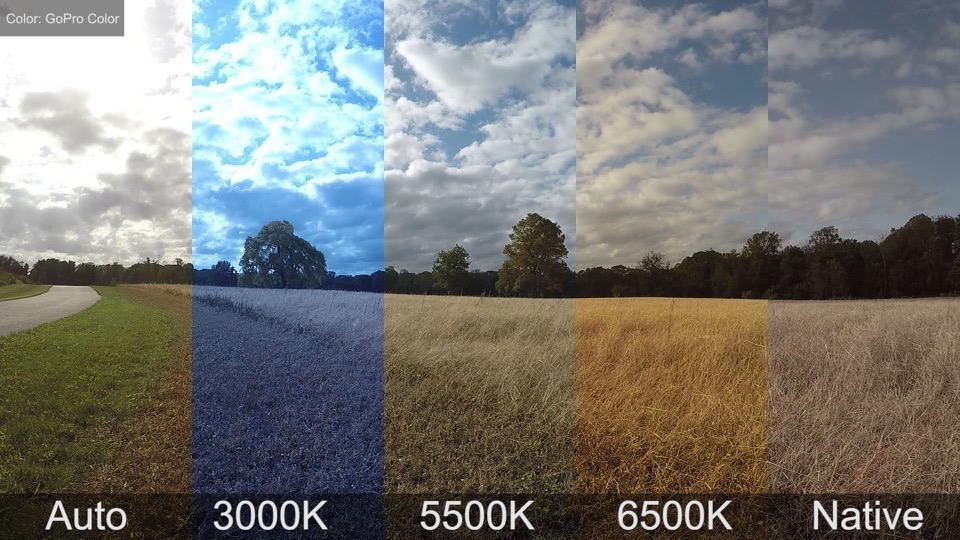
White Balance adjusts the overall colour tone of videos. This can be especially useful if you want to warm up your image a little due to overcast conditions (6500k) or add a better balance to very bright sunny days (5500k).
- Auto
- 3000K (for use in warm light, eg. incandescent, sunrise/sunset)
- 5500K (for use in slightly cool light, eg. cool fluorescent, average daylight)
- 6500K (for use in cool light, eg. overcast conditions)
- Native (HERO4 Only) (Industry standardised optimised colour)
9. Framing is Very Important
Spend some time thinking about where your subject is in relation to the light and you. if the sun is behind you ask the rider to ride downwind of you so you have the sun shining onto them and you in-between. Shooting into the sun can make for great effects, but usually you want your subjects well lit so the order should be Sun > You > Them.
Also think about what your shot will look like, even without a screen on your GoPro, think about the frame and avoid just wildly waving the selfie stick in their direction and hoping for the best.
10. Mark/HiLight your clips with the settings button or hand signals.
It takes hours of footage to make a short film of a few minutes, and sorting through that footage can take a while. On the new GoPro’s you can press the ‘settings’ button while filming to ‘HiLight’ a point in the footage. Perfect after your subject has just landed the perfect trick or you want to remember a specific shot.
If you have an older GoPro, you can use hand signals, …a thumbs up in front of the camera held for 5 seconds will be very easy to find when scrubbing the footage.
